Want to clear out email clutter on your iPhone? You're not alone. Many of us deal with overflowing inboxes and distracting notifications, making it tough to focus. Whether you're switching accounts, decluttering, or just taking a break from persistent emails, knowing how to remove your email can make your device feel a lot more manageable. 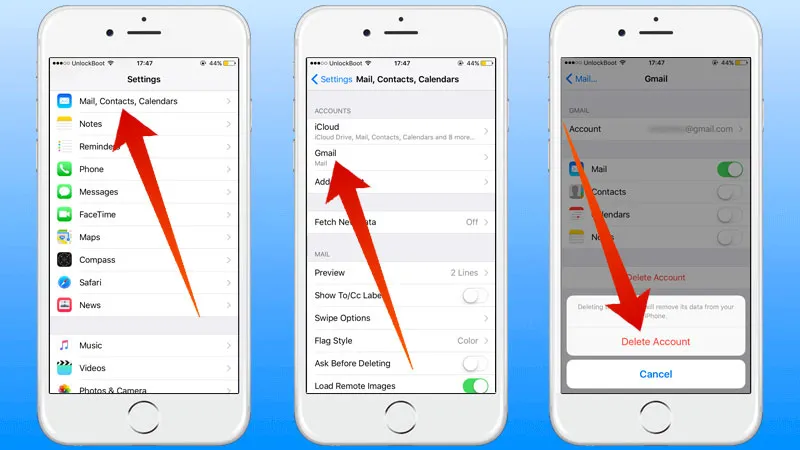
Removing an email account from your iPhone is straightforward, but finding the right steps can sometimes feel like a scavenger hunt. Plus, each email provider has its own quirks, which can add to the confusion. It’s crucial to get this right, especially if your email is tied to other important apps or data.
So let’s break it down. You’ll learn not just how to remove the account, but also what to keep in mind so that you don't lose any important information in the process. If you’ve got questions about syncing or managing contacts, there’s plenty to consider as well.
Core Concepts for Removing Email from iPhone
Whether you want to declutter your device or switch to a different email service, removing an email account from your iPhone is straightforward. Below, you’ll find essential elements to understand this process clearly.
- Access Settings: Begin by locating the Settings app on your iPhone's home screen. This is where all configurations for your device can be found.
- Navigate to Mail: Scroll down and tap on Mail. Here, you’ll find an overview of all email accounts linked to your device.
- Accounts Section: Within the Mail settings, tap on Accounts. This section displays all of your email accounts configured on the iPhone.
- Select the Email Account: Choose the specific email account you want to remove. This will lead you to a page with more details about the account settings.
- Delete Account: Scroll down to find the Delete Account option. Tapping this will prompt a confirmation message. Confirm that you want to delete the account.
- Data Consideration: Be aware that removing an email account deletes all associated emails, contacts, and calendar events. Ensure you've backed up any important information beforehand.
| Step | Action |
|---|---|
| 1 | Open Settings |
| 2 | Tap Mail |
| 3 | Go to Accounts |
| 4 | Select the desired email account |
| 5 | Tap Delete Account |
After following these steps, the email account will be successfully removed from your iPhone. This process is designed to keep your device organized and in line with your current communication needs. Should you choose to reintegrate the email account later, you can do so easily through the same settings menu.
If you’re managing emails in different applications or platforms, it might be useful to explore functions such as scheduling emails in Outlook to enhance your workflow.
Real-World Ways to Remove Email from iPhone
Deleting an Email Account from the Settings
Navigating to Settings, selecting Mail, then Accounts, and finally choosing the email account you wish to remove allows you to delete it easily.
Why this matters: By ensuring you remove accounts you no longer use, you maintain organization and ease in your email management.
Using the Mail App to Remove Emails
Accessing the Mail app, swiping left on the email account name, and selecting "Delete" provides a quick way to free up space and declutter your inbox.
Why this matters: Highlighting the ability to swiftly delete accounts enhances the user experience by simplifying the email management process.
Unsubscribing from a Mailing List
Opening the email from a subscription, scrolling down to find the unsubscribe link, and clicking it removes unwanted emails from flooding your inbox.
Why this matters: Stating that unsubscribing improves your inbox's relevance ensures you see only the emails that matter to you.
Removing Email Notifications
Going into Settings, selecting Notifications, and then Mail allows you to toggle off notifications for specific email accounts.
Why this matters: By keeping distractions at bay, users can concentrate on pressing tasks without constant email interruptions.
Disabling the Mail App Entirely
Accessing Settings, scrolling to Mail, and toggling the Mail switch off ensures that the app doesn’t appear on your home screen.
Why this matters: Providing a solution for users who prefer to limit their email access reinforces their ability to control their digital environment.
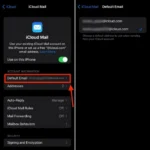
Removing Email from iCloud Settings
Going to Settings, tapping on your name at the top, selecting iCloud, and then toggling off Mail unlinks your email from iCloud.
Why this matters: Asking users to think about their cloud storage helps them manage their accounts effectively and distinguishes between personal and iCloud emails.
Clearing Email Data from the iPhone Storage Settings
Navigating to Settings, tapping on General, selecting iPhone Storage, and finding the Mail app allows you to clear stored email data and free up space.
Why this matters: Highlighting the importance of storage management aids users in maintaining optimum device performance.
Clearing Out Your iPhone Email Accounts
How do I remove an email account from my iPhone without losing my data?
To remove an email account without losing data, back up your emails first. Go to Settings > Mail > Accounts, tap on the account you want to delete, and ensure that options like Contacts or Calendars are turned off before confirming removal.
What happens to my emails if I delete the account from my iPhone?
If you delete the email account from your iPhone, you remove access to the user interface for that account. Emails that were downloaded may remain on your device unless the email provider specifies otherwise, but you won't receive new emails unless you re-add the account.
Can I remove email notifications for a specific account instead of deleting it?
Absolutely! You can mute notifications for a specific email account. Simply go to Settings > Mail > Notifications, choose the account you wish to silence, and adjust the settings. This way, your emails stay but you won't be disturbed by alerts.
Is there a way to temporarily disable an email account instead of removing it permanently?
Yes, you can temporarily disable an email account. Go to Settings > Mail > Accounts, select the account, and turn off Mail. This keeps the account intact while stopping all email sync, which can be useful if you just want a break.
Removing an email account from your iPhone isn’t just about clearing space; it’s about regaining control over your digital life. Once you know the steps, it’s a straightforward process that can help reduce distractions and keep your notifications in check. If you’ve made the decision to simplify your inbox, I encourage you to take that leap and remove what you no longer need. You’ve got this, and your peaceful, uncluttered phone experience awaits!